How to Sync iPhone to iTunes on Windows 10

With the help of iTunes one may play and add audio and video files on both Macs and PCs. Moreover, this software makes it possible for a user to access iTunes store, as well as to sync various media collections to iOS gadgets. It is also a noteworthy fact that with the help of iTunes one can manually sync miscellaneous files such as images, videos, calendars, or photos to iOS devices and vice versa. The program is capable of matching the content of iOS devices with that of the Tunes library on your computer.
The following instructions will walk you through the process of manual syncing to iTunes on the Windows 10 OS via USB and Wi-Fi. Prior to moving on with the overall syncing stuff, please, make sure that you got the last version of iTunes for Windows 10 downloaded.
Syncing iPhone to iTunes on Windows 10 Using USB
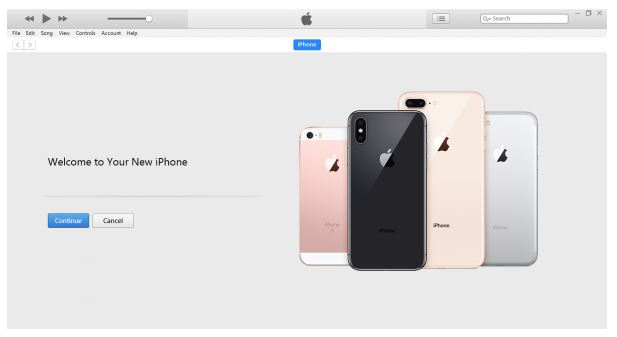
Run the Windows version of iTunes on your computer. Then, connect your iPhone to the PC. You will need a USB dock cable to do it. You can use either 30-pin cable or the original one that came with your iPhone.
Then, open the iTunes program on your comp.
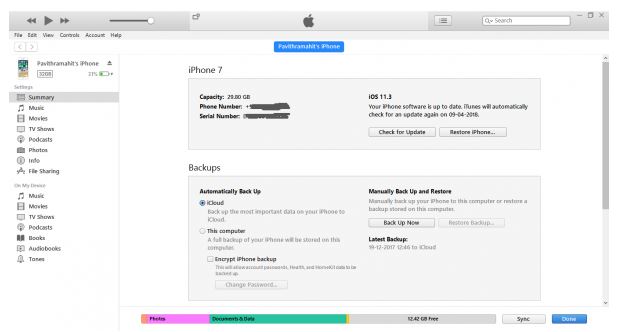
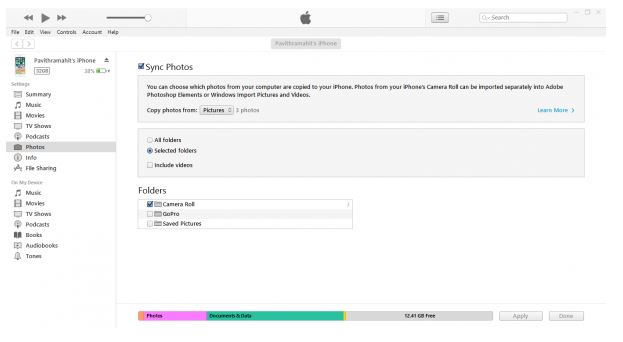
At the top left corner of the program, you will see an icon describing the type of the connected device. What you need to do next is to click on that icon to get yourself conversant with the detail specifications of the device you have connected, as well as the list of available contents on your computer to be synced.
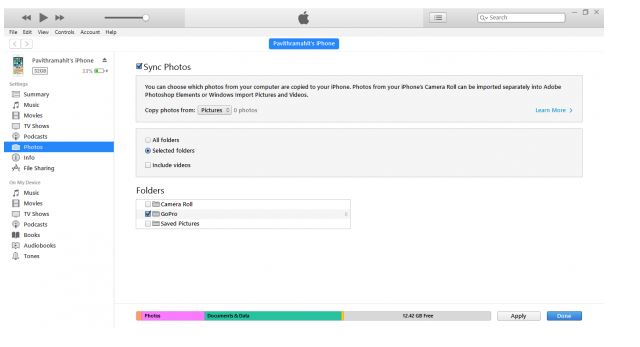
On the left sidebar, such contents as music, videos, and photos will be displayed. You should click on the category of your interest and then look through the list of the syncable contents available under that domain.
Check the “Sync” box displayed at the top of your page for the category you want to sync. After that, choose the contents you desire to sync automatically by plugging your iPhone into the system. You can do the same to get other contents synced by clicking on them and setting a syncing option for them.
Then, click on “Apply” and start syncing.
When you are done syncing all the contents of your interest, wait for the process to complete.
After that, eject and unplug your iPhone from the computer.
Syncing iPhone to iTunes using Wi-Fi
If you are reluctant to mess with cables to connect your iPhone to the computer, there are wireless operations at your service, which can make sync much easier. Nevertheless, syncing over Wi-Fi should be preceded by connecting your iOS device to the computer by means of a good old USB cable. Once you are finished with the initial setup, you can start enjoying your wireless syncs via Wi-Fi. Keep in mind that the speed of syncing will be directly proportional to your wireless connection speed.
Now you are going to learn how to establish the initial setup for iTunes sync using Wi-Fi.
First, you will need to connect your iPhone to the computer via USB dock cable.
Then, run iTunes on your PC.
Again, at the top left corner, you will see the icon denoting the type of the connected device.
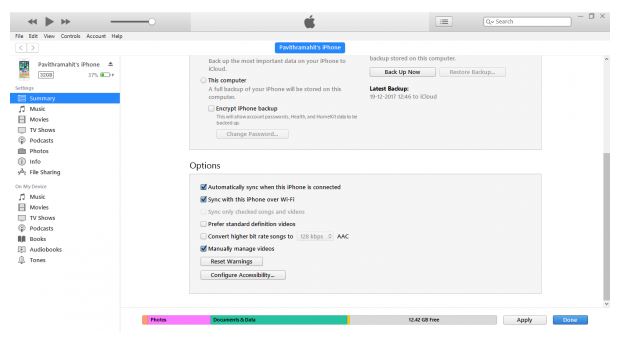
Choose “Summary” option on the left-hand bar.
In the “Options,” choose the box next to “Sync with this iPhone over Wi-Fi.”
Then select “Apply” and unplug your device from the PC.
As it has been noted before, after the completion of the initial setup, you will be able to carry out your syncs over Wi-Fi. You won’t be needing USB cables to connect your iPhone to the computer in the future. Just make sure that you are using the same Wi-Fi network.
After connecting to the Wi-Fi network, run iTunes.
Click on the icon to familiarize yourself with the list of available syncable contents on your computer. The contents may include videos, photos, music, or various TV shows on the left sidebar. Choose the necessary categories to view the content that can be synced under this domain.
After that, tick the “Sync” box at the top of the page to launch the sync of the chosen categories.
Finally press the “Apply” button and “Sync.”
That’s it! You’ve made it!
What's Your Reaction?
Newly middle-aged wife of 1, Mom of 3, Grandma of 2. A professional blogger who has lived in 3 places since losing her home to a house fire in October 2018 with her husband. Becky appreciates being self-employed which has allowed her to work from 'anywhere'. Life is better when you can laugh. As you can tell by her Facebook page where she keeps the humor memes going daily. Becky looks forward to the upcoming new year. It will be fun to see what 2020 holds.

