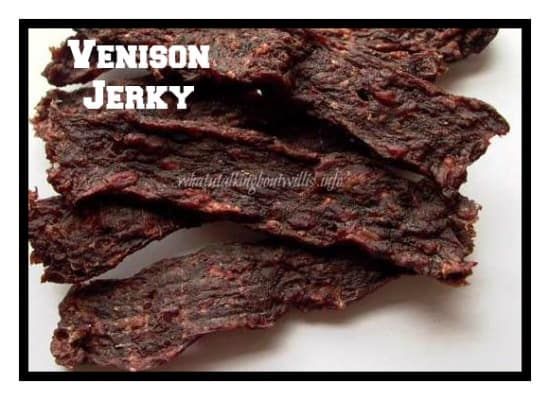
Homemade Venison or Beef Jerky: DIY

Disclosure: This post contains affiliate links. This means if you purchase through one of my links, I will receive a small commission, this will not affect your purchase.
Every year if my boys get a deer or so besides making the ground burger, tenderloins, and stew, we make jerky. It is a favorite in our home; even my daughter looks forward to it. We use a meat grinder and a dehydrator. Also sliced or cubed beef could be marinated.
On the meat grinder, I first use the medium size plate, then run it through the small plate, so it is tender and lean.
Homemade Venison or Beef Jerky: DIY
- 1# ground venison or ground beef
- 1 tbsp salt
- 1 tbsp sugar
- 2 tbsp A1 Sweet Mesquite (or any other flavor you prefer: like Hickory etc)
- If you need to grind your venison make sure you put it through twice to make it easier to squeeze out onto your trays.
- Take your 1# of ground venison or ground beef and put it in a bowl.
- Add your salt, sugar, and seasoning as I mentioned above or a seasoning of your choice.
- Mix by hand, kneading it into the meat to get it throughout your ground meat.
- Once you are done you can either put it in the fridge covered for the night OR fill up your ‘gun’.
- Pack it as full as you can.
- Now pressing the gun you can go in strips or start at one side of the ‘circle’ and carefully squeeze it in a round pattern until you reach the middle or vice versa.
- The tray I showed was early on in the process and I did better as I went along.
- Our dehydrator has a meat selection on it, but if yours doesn’t, then you can time it for 3-4 hours checking it periodically.
- You do not want it too hard but done enough that it isn’t ‘soft’ as it might not be dried through.
- I also rotate my trays taking the one from the bottom and putting it on top and rearranging your trays for even drying.
- You can also use your oven on a 200-250 setting but this will take you a lot longer and you will want to rotate them and turn them over.
- Once done and they have cooled we store them in open ziplock baggies which keeps them fresh but doesn’t allow for them to stick together.
Enjoy your homemade venison jerky!
Homemade Venison or Beef Jerky
Ingredients
1# ground venison or ground beef
1 tbsp salt
1 tbsp sugar
2 tbsp A1 Sweet Mesquite (or any other flavor you prefer: like Hickory etc)
Directions:
- If you need to grind your venison make sure you put it through twice to make it easier to squeeze out onto your trays.
- Take your 1# of ground venison or ground beef and put it in a bowl.
- Add your salt, sugar, and seasoning as I mentioned above or a seasoning of your choice.
- Mix by hand, kneading it into the meat to get it throughout your ground meat.
- Once you are done you can either put it in the fridge covered for the night OR fill up your ‘gun’.
Pack it as full as you can. - Now pressing the gun you can go in strips or start at one side of the ‘circle’ and carefully squeeze it in a round pattern until you reach the middle or vice versa.
- The tray I showed was early on in the process and I did better as I went along.
Our dehydrator has a meat selection on it, but if yours doesn’t, then you can time it for 3-4 hours checking it periodically. - You do not want it too hard but done enough that it isn’t ‘soft’ as it might not be dried through.
- I also rotate my trays taking the one from the bottom and putting it on top and rearranging your trays for even drying.
- You can also use your oven on a 200-250 setting but this will take you a lot longer and you will want to rotate them and turn them over.
- Once done and they have cooled we store them in open ziplock baggies which keeps them fresh but doesn’t allow for them to stick together.
What's Your Reaction?
Newly middle-aged wife of 1, Mom of 3, Grandma of 2. A professional blogger who has lived in 3 places since losing her home to a house fire in October 2018 with her husband. Becky appreciates being self-employed which has allowed her to work from 'anywhere'. Life is better when you can laugh. As you can tell by her Facebook page where she keeps the humor memes going daily. Becky looks forward to the upcoming new year. It will be fun to see what 2020 holds.


